So my little girl asked for a Dollhouse for her 3rd birthday and of course I couldn’t just go buy a house, I had to build one for her. You should have seen the look on the hubs face when I told him and of course this just made me more determined. I followed Ana-White’s Dream House plans except that I got a little excited about the build and added an extra floor.

The plans on her site list the total cost on this project to be around $200, I ended up spending around $50 total. My original plan was to have the hardware store make most of the plywood cuts for me (I was willing to pay extra for the cuts), but the guy said the best he could do was to cut it to fit in my van, boo. After walking up and down every isle trying to come up with a plan B, I came across some thick plywood pre-cut at 24″ x 24″ for $4.99 each and since the plans called for 24″ x 32″ I decided that 24″ x 24″ would work. For the walls I just used two pieces of 2×6 cut to 14″ and glued together.

I cut 16 pieces of 2x2s at 24″ for the floor frames.

This was the perfect project to use my new toy and now favorite tool, the Kreg Jig.

Once my pocket holes were drilled I just attached the 2x2s to all 4 sides using screws and wood glue.

I added scrapbooking paper with Mod Podge to the walls and later a strip of white paper to the top and bottom to imitate molding.

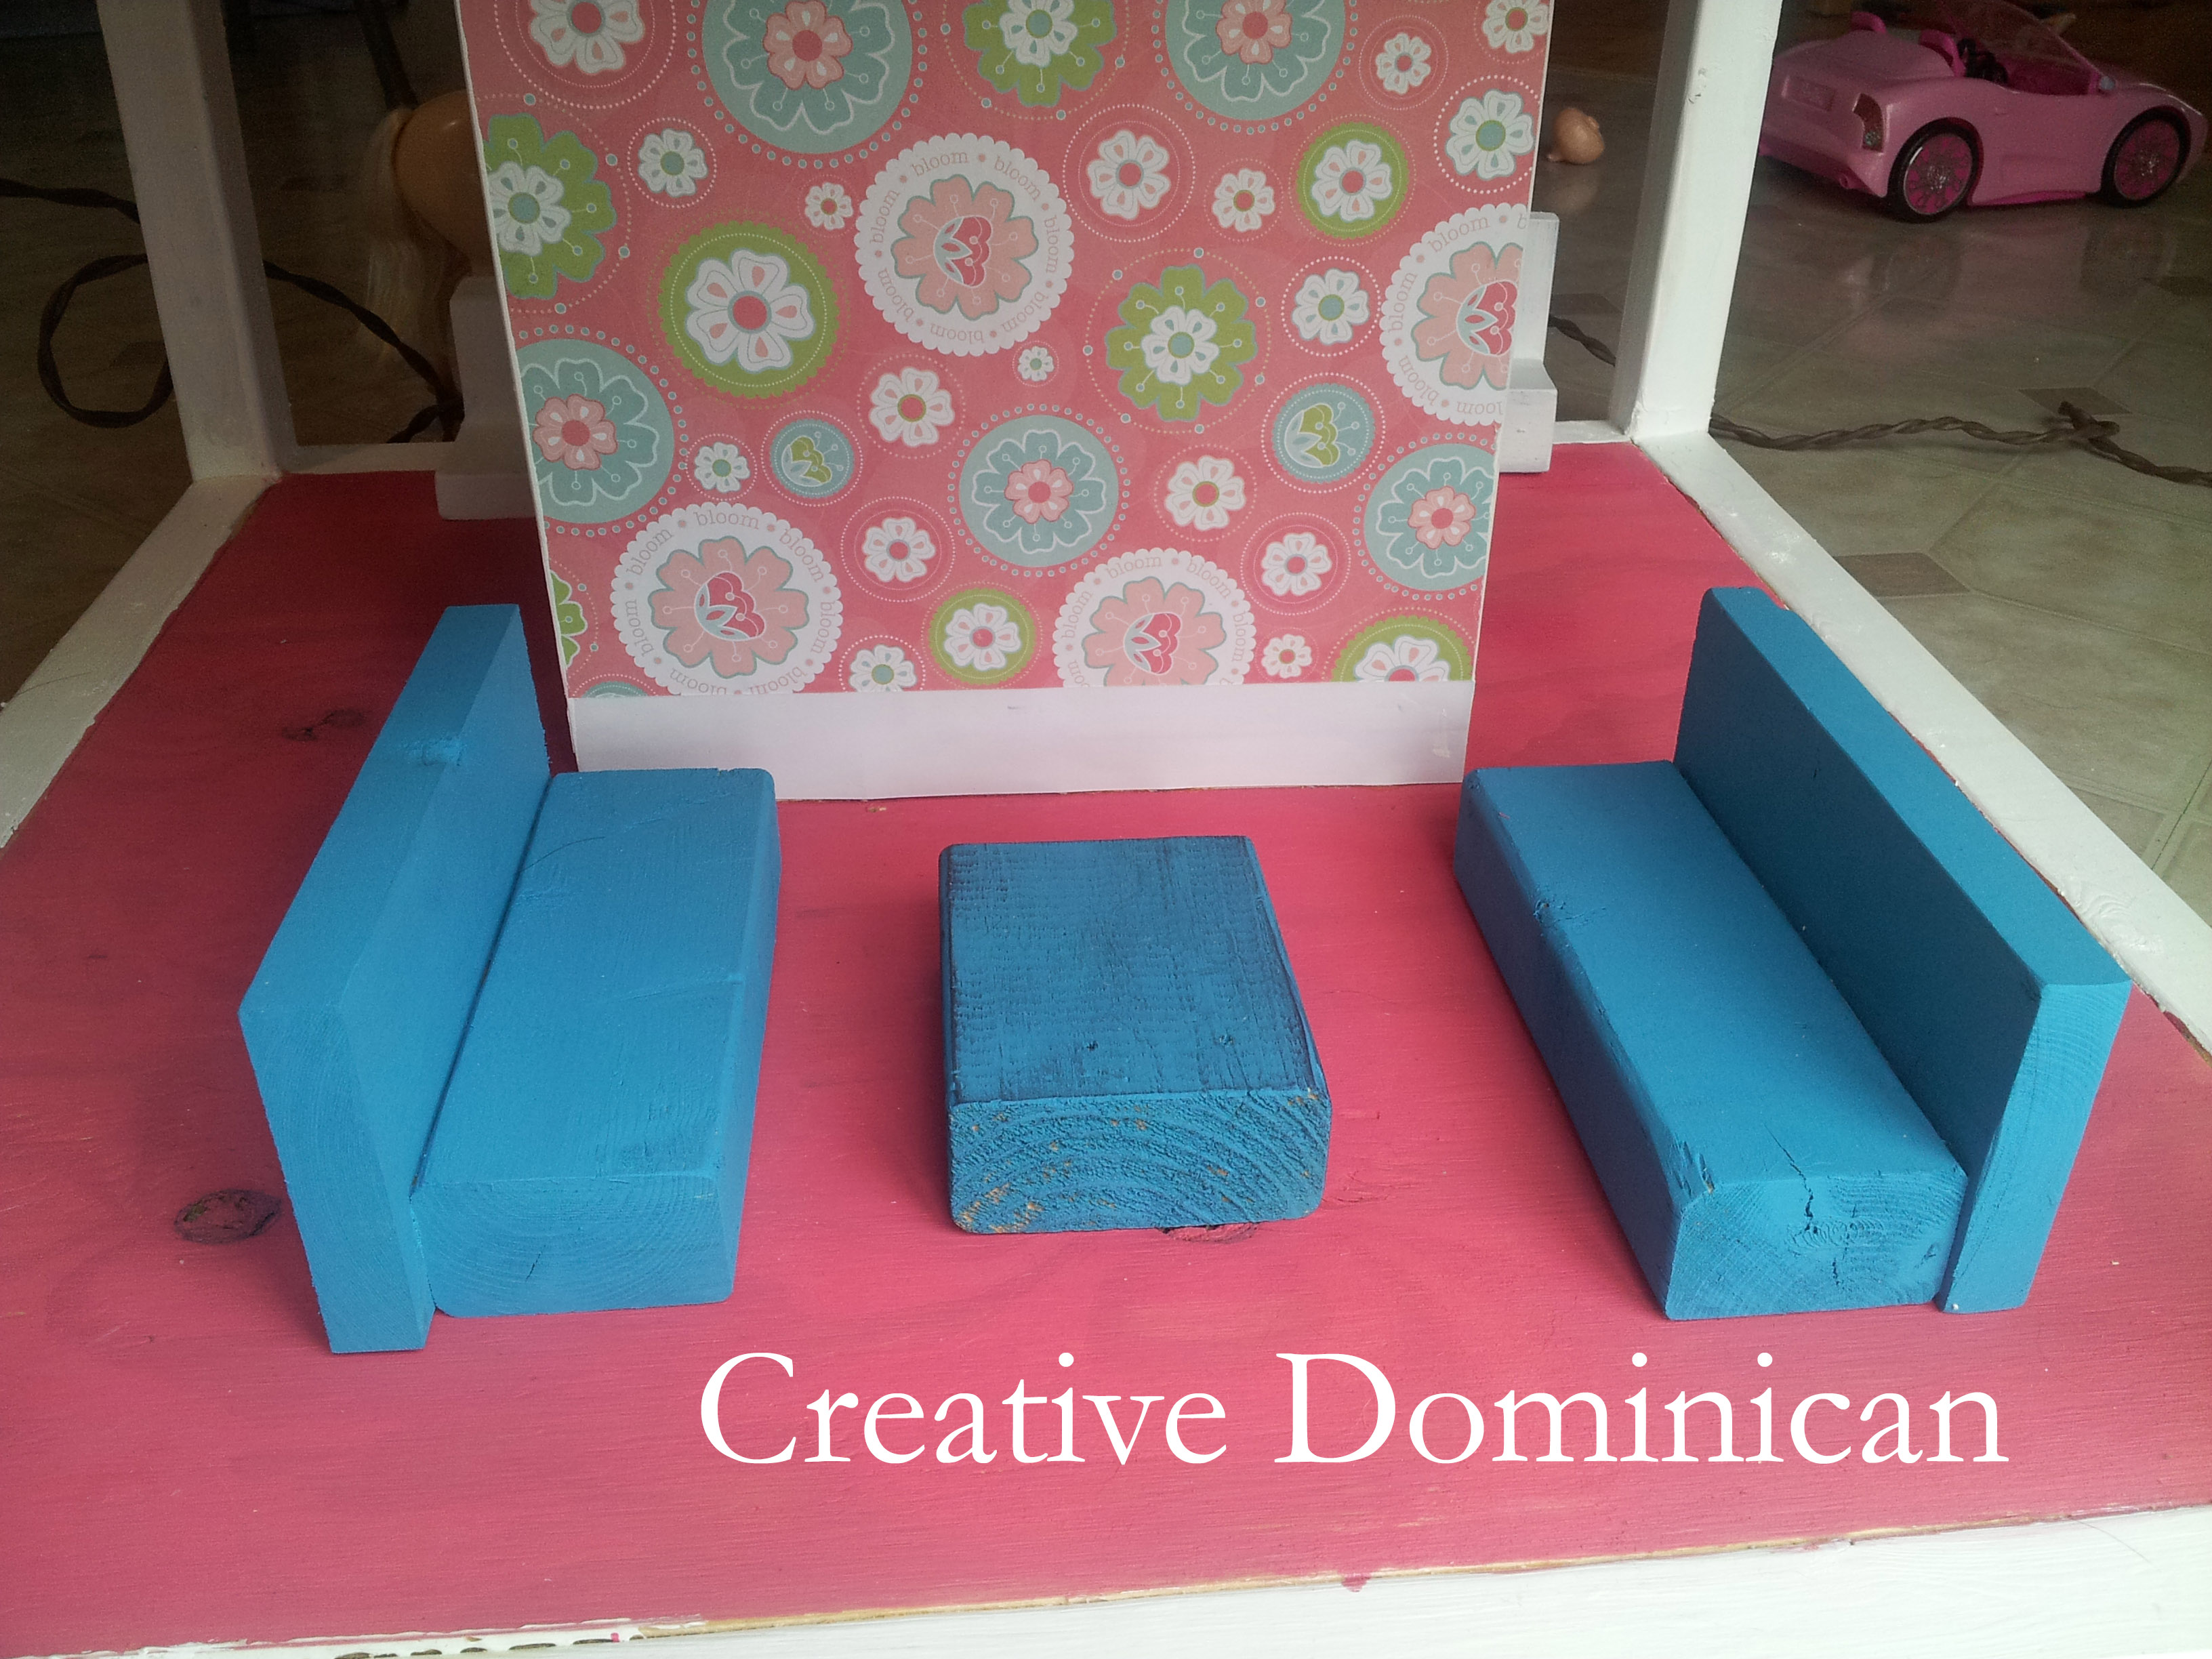
I added some furniture made out of some scrap wood.


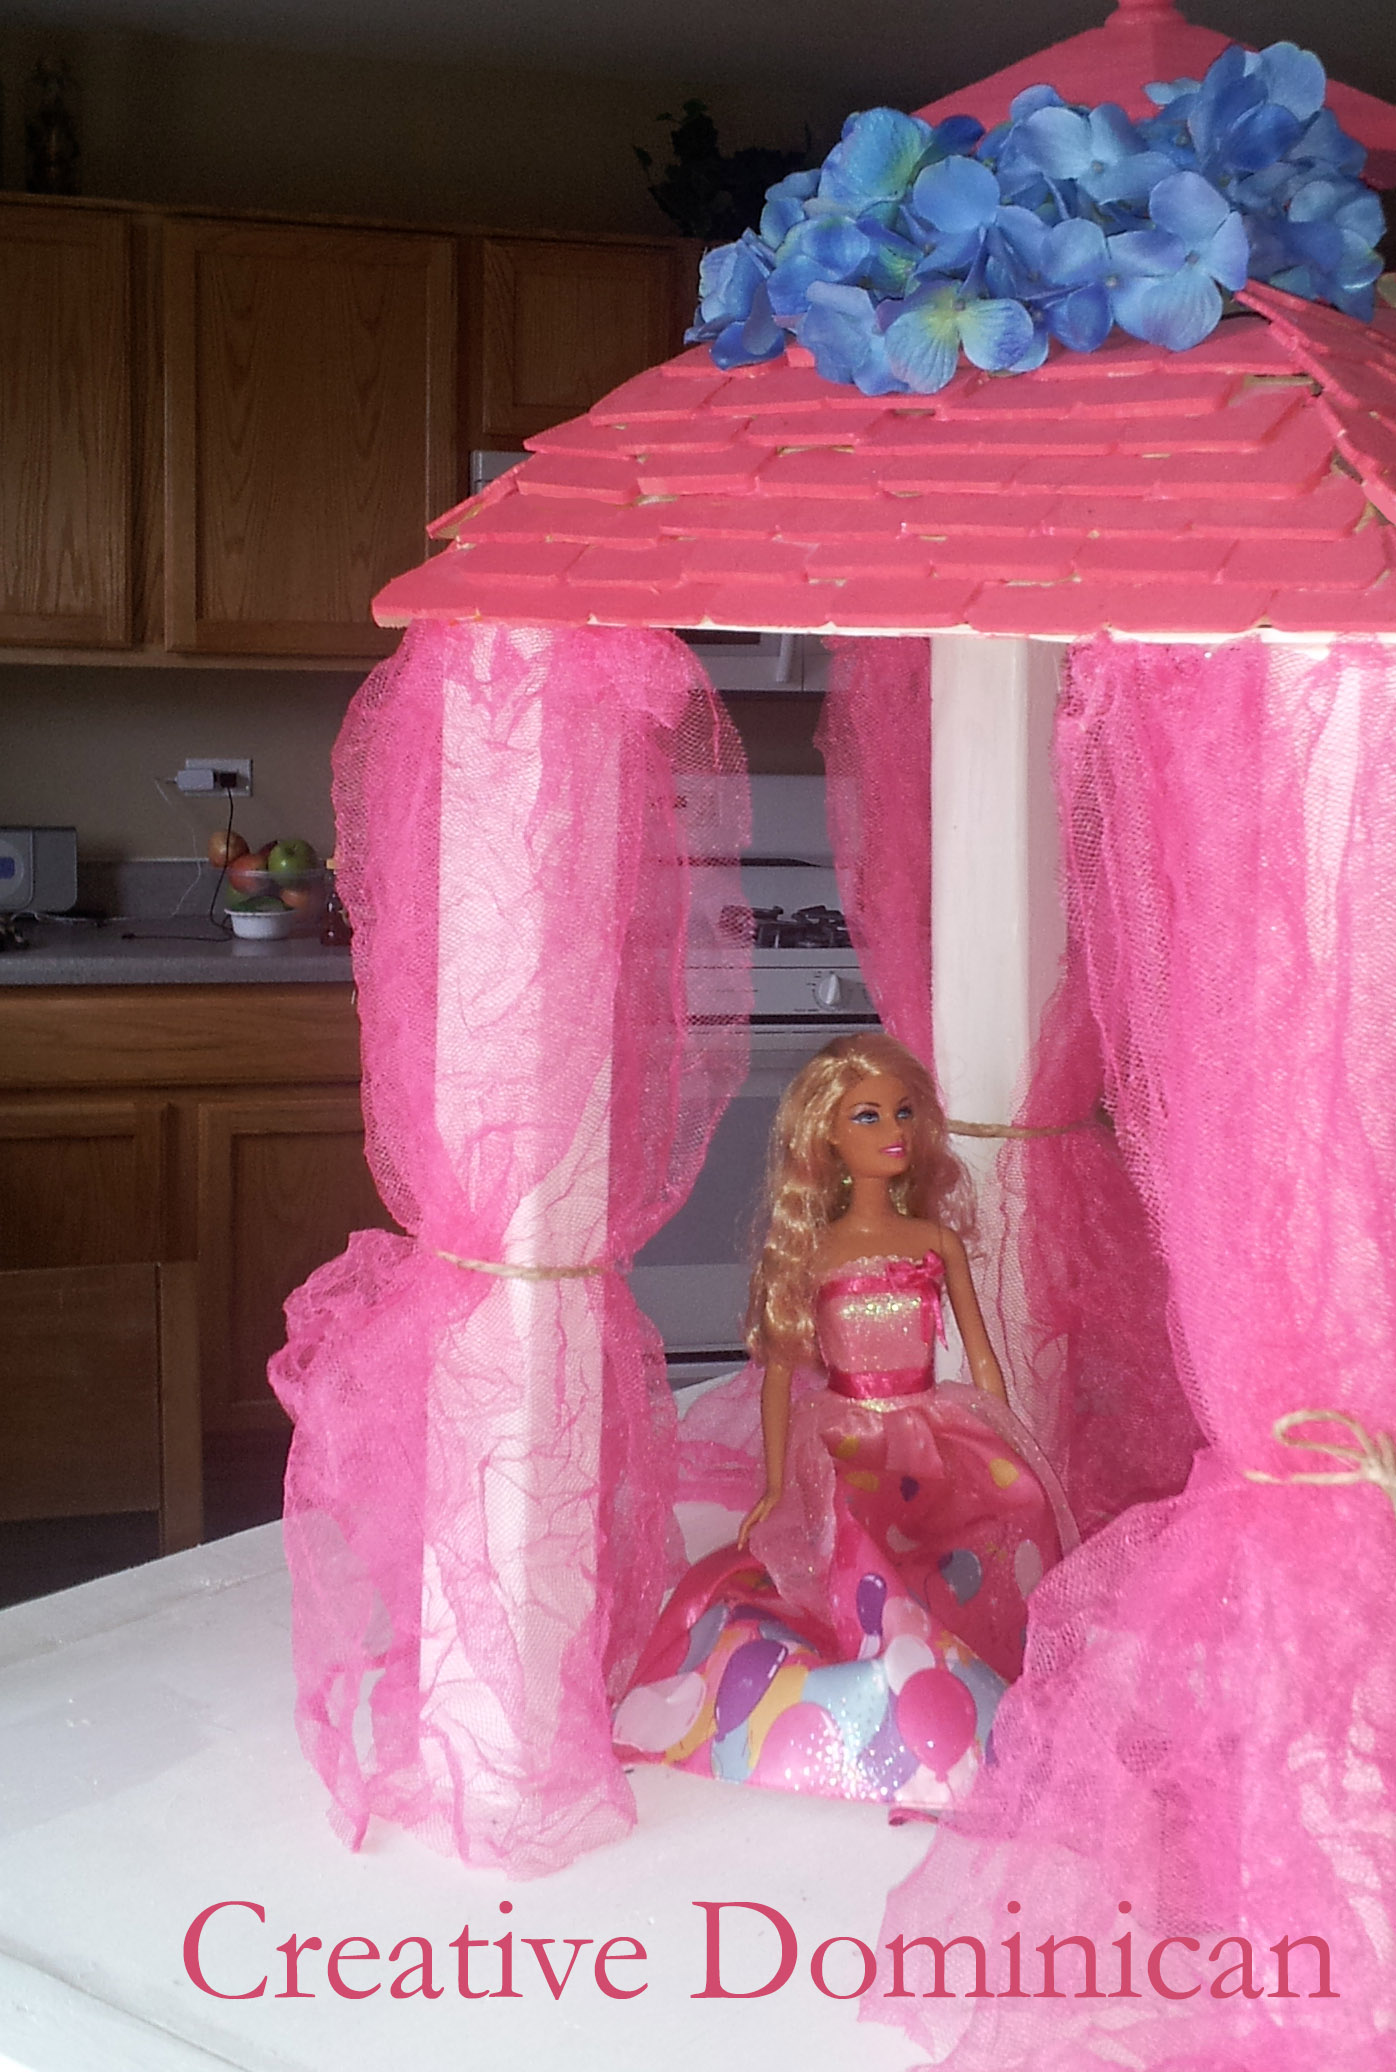
I made the walls a bit taller than the plans called for and at first I was thinking it was a mistake, but then I saw that Barbie liked to ride her horse in the house and I was glad I added the extra head space..LOL

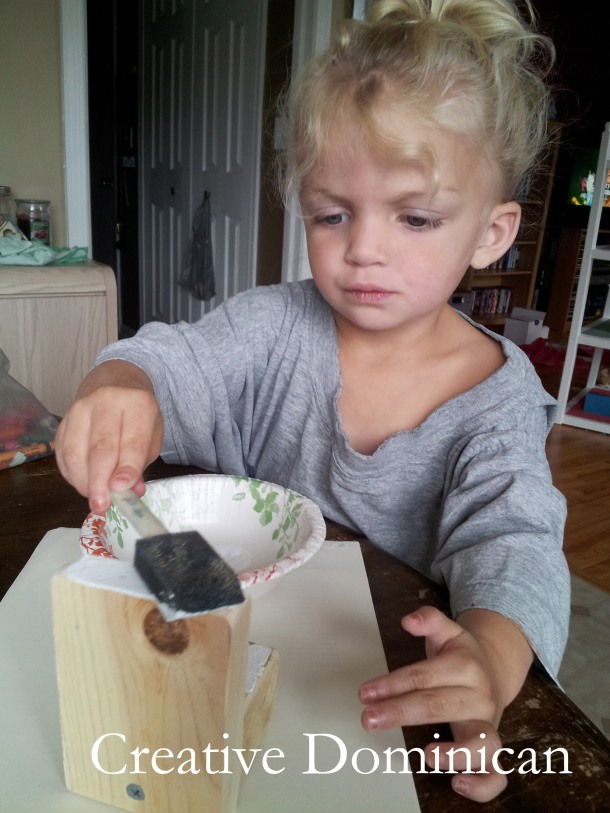
I have to admit I was having second thoughts about this project and that was only because she kept saying she wanted doors and a pool with her house among other things. I was worried that she would have been happier with a house that had doors, windows and a working door bell, but when I saw her jumping up and down after she saw it I was glad I built it for her. She is already making requests for a TV, pillows, blankets and a video game room for the house so it will be fun to just keep adding furniture and things to it. We spent some time yesterday building and painting some additional furniture and I loved it. Next, I plan to add an elevator.
I hope you like it as much we do! If you like it, show some love by sharing it, pinning it, liking it or leaving a comment. I love comments! Follow my blog via the links on the right column or via Pinterest and Facebook to keep up with all my projects.
Hugs,
Beca
Linking up at: VMG206 | 36th Avenue |{wow me} Wednesdays | Lil Mrs Tori | Homework |The Winthrop Chronicles | Titi Crafty | Live Laugh Rowe | StoneGable


It turned out great! She is going to treasure this forever!
Thanks Kerry! I hope she does.
What great memories you are making! It turned out so cute!
Thank you! I sure hope so.
I just love this… I wish I had you around when I was a little girl. I played so much with Barbies and always wanted a big house for them!!! Yayyy that makes me dream!!! hope my girl likes to play with barbies too! Thanks so much for sharing this with me at Bewitch Me & Titi! Hope to have you back with another awesome share! Hope you are having a wonderful week!!!
Hugs
Cami @ TitiCrafty.com
Thanks so much Cami! I was a big Barbie playing kid too so I really got in to this project. Thanks for stopping to visit and comment. Looking forward to the next party. have a great week.
What a sweet project! I love the details and it was clearly made with love!
Thanks Sharon for your sweet comment. I did make it with all the love in the world and that is probably why I was soooo nervous about it.